Saturday, May 22, 2010

The Long Way to Perth, Kalgoorlie to Perth via Newdegate

Last weekend, Phil and I took a couple extra days to go see the new grandbaby in Newdegate and then continued to Perth to see the rest of the rellies.
It is a long drive but very interesting and we saw parts of the Wheatbelt that we had not seen before.  We drove west on the Great Eastern Highway and then turned south just past the Yellowdine roadhouse onto a sandy track called the Emu Fence Road.  I love this road because you have wild sand plain country to the east of the road and bits of wheat fields on the west side of the road.  We drove through some sparse rain and were under clouds the whole way.  The Emu Fence Road turns into the Woolicutty Soak Road and makes a bit of a jog west towards Hyden.  Just past Wave Rock at Hyden we turn south again towards Newdegate.  We spent the night at my stepdaughters farm where we experienced the biggest hail storm that I have ever seen.  When we left in the morning we left them in a state of destruction.  The hail clogged up their gutters and the subsequent rainfall came into the house and pulled the ceiling down in the lounge room.  They were on generator power because high winds pulled a power pole down.
From Newdegate we drove west to Lake Grace and then north through Kulin, Corrigin, Quairading and York.  I had always wanted to go to York.  I had heard that it was beautiful and historic.  The photos show the beautiful buildings on the main street.  But I found the main street of Corrigin a much nicer and more friendly place.  Perhaps York is just too close to Perth.  Corrigin is a lively farming town where real working class people frequent.  Everyone seemed to know each other.  I found the Craft and Arts Shop where the local crafters meet and share a cuppa.  I bought a couple really nice hand crocheted items.  Surprisingly I didn't find any shops in York that interested me.
In Perth we had a great time visiting everyone and had a great outing to Kings Park and Fremantle on the Sunday.  It was a magnificent winter day.
Hope you enjoy the following photos:

 This sign posted at the Yellowdine Roadhouse really cracked me up.
View from the top of the world after we turned onto the Emu Fence Road.

Here you can see the fingers of wheat fields to the west of the road. 

See, it really is called the Emu Fence Road!


Hail Storm in Newdegate

Main street in York with the hills (The coastal range) in the background.

How charming is this sign!
Great hotel in York.
York Town Hall

I forgot how beautiful the view is of Perth from Kings Park.

Eucalyptus lined avenue into Kings Park.
I really love these trees.  They are called Lemon scented gums, Eucalyptus citriodora.
View of Downtown Perth, Convention Centre and the foreshore along the Swan River.
Lunch in Fremantle with Freddy the freeloader eyeing my lunch.  I'm having my favorite grilled sardines and greek salad.  Yum!
The Fremantle esplanade is a great place to enjoy a Sunday morning with the entire family.  These are some healthy and majestic Norfolk Island Pines and you can see the famous Esplanade Hotel in the background.

Thursday, May 20, 2010

Tapestry Sampler


I never thought I would really ever want to try tapestry weaving.  Although I admire greatly the work of those who do it, I always thought it looked rather boring and tedious.  However, in anticipation of taking a Navajo rug weaving workshop, I decided to try my hand at it.  I made this rather garish sampler following the directions taken from Kirsten Glasbrook's book "Tapestry Weaving."  It is a good little book with some really cute small beginning projects.  The sampler, as you would expect, shows you all the basic techniques.

I already own a tapestry loom but it was too big for such a small project so I went out to the local junk shop and bought a wooden frame.  I removed the glass, the guts and the backing and strung the warp over it.  I used 8/4 rug warp and Lamb's Pride worsted weight for the weft. 

What I learned:  That my 8/4 rug warp was a bit too light for my weft so I have ordered a heavier seine twine to try out on the next one.  I didn't like the fact that you just leave loose ends at the back of the work.  I found that to be messy and untidy.  I think when I take the Navajo weaving class, I will learn how to have a neat surface on both sides.  One of the techniques I was completely hopeless at and will require more practice but otherwise it was an entertaining little project.

Now, what do you suppose I should do with the finished product?  Hide it in my studio!

Saturday, May 8, 2010

Easter Camping--Great Victoria Desert

We went camping over the long weekend with some friends.  Our itinerary took us north of Kalgoorlie to Jeedamya Station where we camped the first night and were hit with gales and sheets of rain that blew one tent away.
Day two we proceeded to Leonora where we turned east and drove to Laverton.  North of Laverton we linked up with the Great Central Highway which runs all the way across the continent to Winton in Queensland.  We drove north east stopping to investigate a Bower Bird's Nest and some rock holes along the way (gnamma holes).  At Tjikurla Roadhouse we fueled up for the last time before going off the main road.  And we camped in a borrow pit just past the roadhouse.
Day three we turned east along the 27th parralel following a dirt track called Parralel road #2.  This road undulated over sand banks and into drainage lines and then up onto rock plateaus until we reached the Connie Sue Highway which runs due north and south.  We were hoping to go into Waterfall gorge and Sydney Yeo Chasm but found that the tracks were sign posted by the Aboriginal Community that we were not allowed to enter.  We reread our transit permits and realized that we should have asked for permission to enter.  Other members of our party had been this way before and there were no restrictions at that time so we didn't think to organize it.  That was a bit of a disappointment.  We traveled south on the Connie Sue past Hann's tabletop and Ryan's Bluff.  Phil found us a great camping site under the big Marble Gums.  The sunset was beautiful.  Day 4 we continued south to Neal's Junction stopping off at Point Sandercock where we found middens of the lesser Stick Nest Rat who is now extinct.  I lost my beloved Norwegian knife there including the leather sheath! On to Point Lillian, these are rock outcrops that we call Breakaways.  There are shallow caves under the lip of the hard weather resistant rock and great views of the country from the top.  At Neale's Junction the Connie Sue crossed the Anne Beadell Highway (another dirt track).  There is a sign post there that has all points marked on it.  "Coober Pedy 600 miles" to the east.  I would love to do that some day.  We turned back west towards Laverton and camped for the night at Bishop Riley's Pulpit.
Day 5 was back to Laverton via Lake Yeo Homestead, Yamana Homestead, Point Sunday and White Cliffs station and then home.    We covered all up 1825 kilometers!  It is great that there are still places in the world where you can drive, not see another vehicle for days and camp wherever you like.


Not sure how to tip this upright.  Rain puddles at Jeedamya Stations.

The Convoy!  Phil and I took the lead so we could radio the others about plants along the way.

Beautiful Sunset under the Marble Gums.

Billies on the Fire.

Point Sandercock

Bush Shower at Lake Yeo Homestead and Nature Reserve

It was a great trip.  We hope to do more in the future.  I hope you enjoy these photos and let me wish all the Mum's out there a Happy Mother's Day!

Saturday, May 1, 2010

Paula's Sweet Chilli Sauce

I'm thinking one of the good things about having a blog is that I can put my best recipes on here.  The one's that people keep asking me for.  Instead of asking everytime and me having to write it out on a scrap of paper, you can just get it here any time.

My stepson has asked for another jar of my chilli sauce so it reminded me that everyone likes this recipe.

Phil used to judge the local flower show.  His payment over the years as mystery judge was to receive a jar of chilli sauce from one of the organizers.  I had never had this kind of chilli sauce before.  It is good on cold meats and hamburgers.  I also put it on my chillie mussels when I cook them.  In the US Chillie sauce is more often a hot meat sauce that we put on hotdogs.  This is completely different. I set out to try to copy the flower show sauce.  I am sure that mine is probably not even close but it tastes just as good.  Mine works out to be in the medium to medium-hot range.  You can put in fewer chillies if you want it less spicey.

Ingredients:
16 hot chillies (2 inch in length)  adjust to desired heat
1 regular sized tin of diced tomatoes (1 3/4 cups)
one large onion
1 large apple, cored
1/4 cup sultanas or raisins
8 cloves of garlic
2cups of vinegar (cider vinegar or malt vinegar is best)
2 cups of sugar
1/4 tsp each of allspice, cloves, coriander, celery seed
1 tsp each of paprika and dried mustard
salt and pepper
squirt of soy sauce
squirt of fish sauce

I blend all the chunky ingredients in a blender in batches.  Then put the lot in a stock kettle.  Bring to a boil and put on the hood fan as the fumes will be potent.  Let simmer until the desired thickness.  I bottle it in sterilized jars and vacuum seal them.  This will last at least a year, if you don't eat it all first.

Wednesday, April 28, 2010

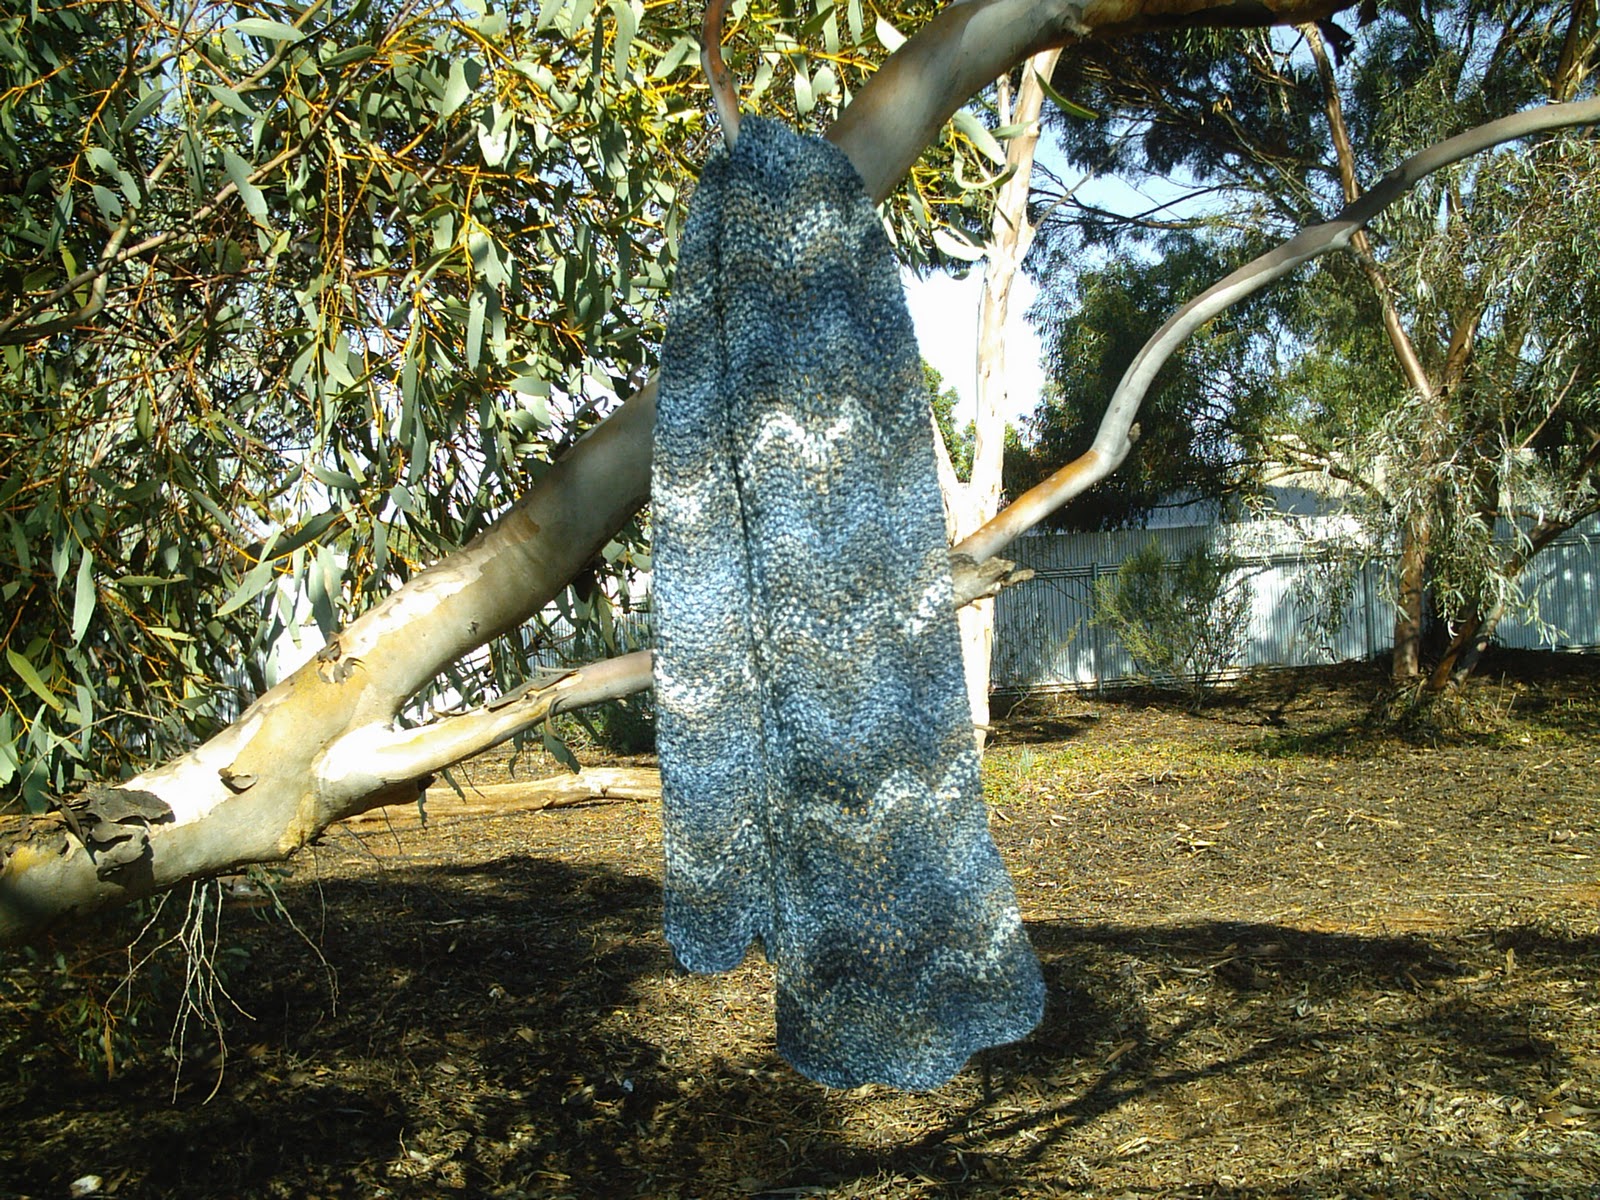
Feather and Fern Lace Scarf

For all of my fans out there who are clamoring for another post....here is a quick one before the weekend.  I have some more ideas.  I have discovered that I enjoy starting projects more than slogging through to completion.  This was starting to become a problem from a space point of view so I have resolved to not start any new....well maybe just a few.....but not many.....projects until I have completed some of the outstanding UFO's (Unfinished Objects).  This scarf has joined the ranks of Finished Objects and I have posted it on ebay for the next week if anyone is interested.  It is knitted in a Feather and Fern Lace Pattern and the yarn used is an 80-30 blend of wool and silk.  This photo washed out the colours.  It is darker than it looks here.  Perfect with blues or denims and there is a natural cream and taupe color also so it would be nice with browns.  This was a really smart little kit that I purchased several years back from Bilby Yarns in Perth, my favorite local source of supplies for weavers and spinners.  June Lynn is the proprietress and she is the city depot for the WA Melanian Sheep Breeders Society.  She has a website but it doesn't completely reflect everything that she carries so it is best to ring her with any queries.  A visit is even better but take your banker with you!  You will want one of everything!

Monday, April 19, 2010

EARTHQUAKE

I just experienced the biggest earthquake in my life.  It was short, sharp and loud.  I was standing at the kitchen counter peeling a Kiwi fruit to put in my cereal when it happened.  I just had time to realize and react but before I dashed out the back door the smoke detector which is anchored into the ceiling gyprock with two anchors fell down onto the kitchen table.  But I was out of the house so fast I barely remember opening the back door.  Reminded me of the time I found myself in a tent with a Cotton Mouth Snake in Myrtle Beach.  To this day I do not remember unzipping the tent to get out.
We have lots of tremors here in Kalgoorlie and they are usually mine blasts but this was much stronger.  Got my heart pumping that is for sure!  Poor Catitude was looking a bit shell shocked before she disappeared under the house to hide.
Phil says he heard that a piece of the facade at the Recreation Hotel fell down and some ceiling panels at the Lionel Street IGA also fell down.  At least we don't live or work in buildings that are more than one storey here so we are likely to be able to flee danger.
Just heard that it registered 5 on the Richter scale and the epicentre was 10 miles outside of town.

Sunday, April 18, 2010

Olives

March is the time to harvest olives in this part of the world.  My husband used to have a prescribed date but we have had many years of no olives due in part to drought.  This year the olives seemed a bit small on the prescribed date so we let them go a couple of weeks longer.  Then when we realized Easter was looming in the not too distant future we decided we better pick so that we would have them processed before Easter.  There are many methods of making olives palatable.  We use one of the fastest methods and it still takes about 13 days.  Here is how it works:
Picking:
Pick the olives green and take care not to bruise them by dropping them hard into the bucket.  Most instructions say to sort them by size but I don't do this mostly out of laziness and justifiably due to thrift.  The small olives fill up the empty spaces between the bigger olives in the jars.  I think though if you want consistent flavour and texture it is best to sort them.  After picking wash them.
Processing:
The old fashioned way is to soak and rinse the olives in plain water morning and night until the bitter taste has been leached away.  This can take a two to three weeks and uses a lot of water which we find problematic living in a region with water restrictions.  Some people cut the cut the olives to the pip in four places to speed up the leaching process.  This is a bit of work and destroys the lovely intact look of the olive.  So I don't choose to do this.  We use the caustic soda method. Remember to follow the instructions on the bottle of caustic soda.  Caustic can burn you so you must wear rubber gloves.  Use plastic or stainless steel containers and utensils when working with a lye solution. The caustic soda (aka lye) reacts with the bitter components in the flesh of the olive and extracts it.  Mix 15-20g of caustic soda per litre of water.  Also add the equivalent amount of salt, they say this prevents the fruit from becoming too soft. Place a plate on top of the olives to keep them submerged otherwise they will turn brown. Check the olives every 2 hours by pulling out a large fruit with a spoon, rinse it and then cut a wedge out of the side of the fruit piercing all the way to the pip.  When the caustic soda has worked its way to 1/2-2/3 of the way to the pip the olives are ready.  The caustic soda infiltrated flesh is a darker green.  This year it only took 4 hours in the caustic soda for the olive.  In years past it was more like 8 hours.  Now rinse the fruit in fresh water repeatedly until the fruit no longer feels soapy.  Let the fruit sit overnight and rinse again in the morning.  You want to get all the caustic soda out of the fruit so allow plenty of time for this phase.
Next the olives go into a series of salt brines as follows:
25g of salt per litre for 1 day
30g of salt per litre for 3 days
40 g of salt per litre for 7 days
Place a plate on top of the olives to keep them submerged in the brine.
Bottling:
Wash and sterilize your jars.  You should pack them in a brine of 40g of salt per litre.  If you are going to put them in a hot bath to vacuum seal them this is enough.  Otherwise the instructions recommend putting in 4 parts brine and one part of vinegar.  I only add enough vinegar to taste because one year the vinegar I used was so strong it rendered the olives nearly inedible.  I put in a prig of rosemary, cloves of garlic cut in half and hot chilies cut in half to add a bit of flavour but this is purely up to you.  If you are not going to vacuum seal the jars leave enough head room to ensure the olives are submerged and top off with a layer of olive oil.  This will protect the olives from spoilage.  Wait a week or two and the olives are ready to eat!


I also made four jars of what I call the "Smashed Olive" technique.  You smash each olive with the but end of a beer or wine bottle and throw it into a bucket of water.  Once the olives are all smashed you need to sort through them to remove the pips.  This is harder than it sounds and left a brown stain on all of my finger nails.  My thumb nail was the brownest and a bit sore after I had finished.  Soak these in water changing the water morning and night for 3 to four days.  You can taste the olives to know when they are ready.  Once the bitter taste is gone drain them and salt them to taste, add whatever herbs you want and drizzle a bit of olive oil on them.  Pack into sterilized jars and top with a bit of olive oil.  These are great in salads, meat dishes and kneaded into Ciabbatta!  Yum!
Black olives:  My friend Sabine told me how to do these and I will try a couple of jars when the fruit on the tree ripens.  She mixes the black olives with rock salt and then packs them into sterilized jars.  Once a day she cracks the lid and drains off any liquid which has been drawn out of the olives by the salt.  Once the olives stop weeping they must be washed to remove the salt and then can be repacked in the jars with olive oil.  I will try these later and let you know how they turned out.  Cheers!